As promised, I'm back to give you a few of my favorite makeup tutorials and tips for Halloween. Whether you're planning on going out, or having a mellow Halloween at home, it's always fun to dress up for the occasion.
Before I start, I thought I would introduce you to a few of my makeup staples. While this is not cumulative display of my collection, it does cover the products and tools that I consistently use in my Halloween makeup looks.

Pictured:
+ Target White Face Paint Tube

Also, I thought that I would also take this opportunity to share some of my favorite drugstore lipsticks for fall and Halloween. By the way, they are only $1.99 at CVS! Secret's out.
Starting from left to right:
Now onto the tutorials! *Note*: I am by no means a makeup artist. I simply enjoy Halloween makeup, and would like to share my experience with others. Without further ado, let's begin!
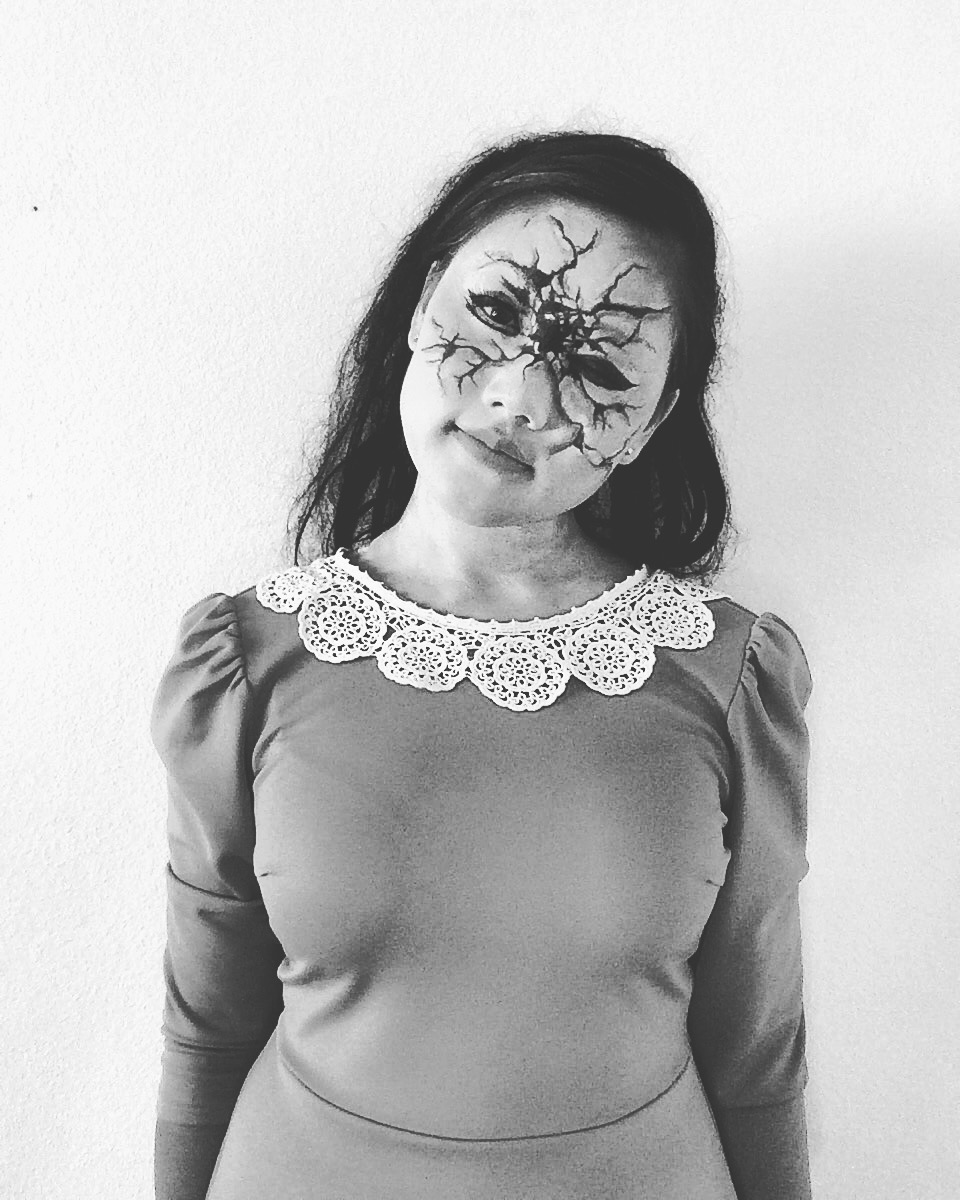
BROKEN DOLL:
I gained inspiration from this look from both Lex of Madeyewlook and Alison of AlisonlovesJB. I pretty much mixed their tutorials together to get my desired look.

- Clean your face and moisturize.
- Apply concealer and eye primer.
- Apply a foundation several shades lighter than your natural complexion, or apply a light coat of white face paint to your face and neck. You want to make your face pale resemble the complexion of a porcelain doll by making your skin look as smooth and even as possible. If you decide to go with face paint like I did, there is a great $1 face paint from Target that you can use. Apply the product with a disposable foundation applicator using a dabbing motion throughout your face and neck. Do not use a brush, as it will leave streak marks on your face. Please be aware that because this product is intended for leisurely use. As a result, you may need to allow time between face paint applications to let the product dry before continuing to build up to your desired color.
- Set your face with a face powder. This is very important, because you do not want your foundation or face paint to budge.
- Apply your favorite rosy blush to the apples of your cheeks.
- Use a black gel liner and a thin eyeliner brush to create a cat eye on one of your eyelids.
- Close your other eyelid, and feel the shape of your eye. Find the crease, and then apply gel liner all over the closed eyelid. This will be your "missing eye". Don't forget to set it with a black eyeshadow!
- Now find an area of your face where you would like to start the cracks. I chose the area between my eyes. Use your gel liner to draw lines across your face, and fill in any intersecting lines to illustrate pieces of your porcelain face that might have "fallen out".
- Once you are done creating your lines and filling in different areas of your face with gel liner, go back with a white liner and trace the sides of some of the black lines that you have already created. This will create a raised look to your skin.
- When you are done with this step, you can go back with some gray eyeshadow and shade in the other side of the black eyeliner lines to add more dimension to your cracks.
- Now apply your favorite pink lipstick or lipgloss, and you are all done!
FLAPPER/MIME:

I gained inspiration for this look from YouTuber, Emma Pickles. In her video, she attempts to recreate a runway look by the famed, Pat McGrath. You can follow her tutorial here.
If it helps to refer to a written tutorial:
- Follow steps 1-5 of my broken doll tutorial.
- Use a concealer or extra white face paint to conceal your eyebrows. Set it with a face powder.
- Use a liquid liner pen (I used Maybelline) to draw in your thin, 1920s inspired eyebrows. They don't have to be perfect. That's the fun part about it!
- Fill your eyelids and below your eyelids with purple eyeshadow, and blend them out to create a watercolor effect.
- Fill in your crease with a dark purple eyeshadow or black eyeshadow. Then blend it out.
- Line your top and bottom waterline with black eyeliner.
- Grab a clean eyeshadow brush, and spray a little bit of water onto it. Then pull the black eyeliner color from your bottom lid down with short brush strokes to create a runny effect.
- Line your lips and then fill them in thinly with a dark, maroon lipstick. I used "Cherry Bomb" from Wet 'n' Wild.
MORTICIA ADDAMS:
I've been wanting to recreate this look ever since I did the Wednesday Addams look last Halloween. I used a lot of photos from the internet as a reference.

- Follow steps 1-5 of my broken doll tutorial.
- Use a dark eyebrow pencil or black gel liner to create thin, arched eyebrows.
- Apply white eyeshadow to your eyelids.
- Find your crease, and fill it in with black eyeshadow. Blend it out (and up) for a softer look.
- Place a piece of paper or a business card flat on the side of your eye (move it to about a 45 degree angle from the edge of your eyelid) and blend out the black eyeshadow from your crease to create a smoky cat eye effect.
- Use a gel liner to line your eyelid. Aim for a cat eye.
- Use a black eyeliner to line your bottom waterline, making sure to use a smudge brush to soften the line.
- Use a contouring brush and gray eyeshadow to contour your nose, cheeks, temples, and chin.
- Line your lips with a red lipliner, and apply your favorite shade of red lipstick.
- All done!
Ok Disney fans, this one is for you. Here is my twist on the famed puppy snatcher.

If you have been following along with the previous tutorials, this one's a cinch.
MAKEUP:
- Follow steps 1-5 of my broken doll tutorial above.
- Apply white eyeshadow to your eyelids.
- Above your eyelid crease, apply copper/brown eyeshadow.
- Apply dark brown or black eyeshadow on your crease and blend it into the copper/brown eyeshadow.
- Use a dark eyebrow pencil to create high arched eyebrows. Use a spooley to blend the color into your eyebrows.
- Tight line your upper eyelids with a black eyeliner.
- Next, tight line your lower eyelids with a white eyeliner to make your eyes appear bigger. Then line the area underneath that with a black eyeliner. Don't forget to smudge out the black line to soften it up.
- Apply mascara to your eyelashes and/or falsies.
- Use bronzer to contour your nose, cheeks, and chin.
- Apply your favorite shade of lipstick. I used "Cherry Bomb" from Wet 'n' Wild.
HAIR:
- Curl your hair. Overnight, curlers, curling iron...whatever you like. Let the curls cool down before proceeding to the next step. This is very important! Do not skip it, or your curls WILL fall!
- Backcomb and tease your roots and curls with a teasing brush.
- Apply hairspray.
- Use a white temporary spray dye on half of your hair. If you don't have the spray, use a fine-toothed comb and the $1 white face paint from Target to create your white hair. Squeeze some product into your hands, and then distribute the product with the comb. Don't worry, the product will wash away with water in the shower. I already tried it for you.
There you have it! A few of my favorite Halloween looks and tutorials for this year. If you have any questions, please feel free to leave a comment below, or tweet me via @mtranstyle. You can also follow my day-to-day activities on Instagram via @Tran_gerine. Until next time, Happy Halloween and happy styling!
xo
Melissa